July 24, 2020
Getting Started: Using Liquibase with Azure Postgres
See Liquibase in Action
Accelerate database changes, reduce failures, and enforce governance across your pipelines.

I recently had to set Liquibase up to do some work on Azure Postgres. Both Azure and Postgres have seen an uptick in popularity and the combination works really well. Microsoft’s embrace of open source technologies and wrapping their easy-to-use stuff around it definitely seems to be working. The whole experience was really relatively pleasant so I wanted to share it with the community.
This post will walk through a very simple setup that should help get you up and running quickly.
The setup includes:
- My sandbox environment: CentOS 7.8, JDK 1.8
- Liquibase 3.10.0
- Azure Postgres (set for Postgres v10)
Getting the example DB
I am going to work through the setup using the Azure Portal. That will enable us to see all of the options / settings available. The GUI is a really great way to learn the Azure object management model, though I would encourage you to quickly move to the AZ command line tool. It is very rich, easy to use, and will enable you to automate this (and your other Azure stuff) with low effort.
Note: You will need an Azure account for this and there is, unsurprisingly, a surfeit of information on how to do this at: https://azure.microsoft.com/
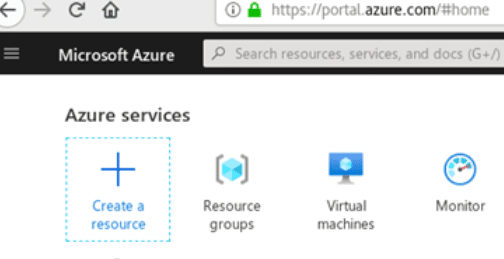
1. Go to the Azure Portal and click the big plus sign that says “Create a resource”.
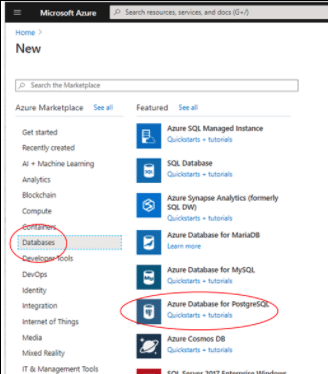
2. Select the Databases Section and choose “Azure Database for PostgreSQL.
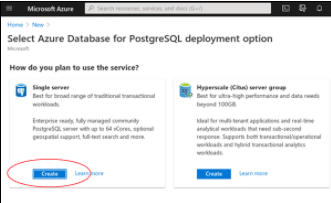
3. Choose a single server.
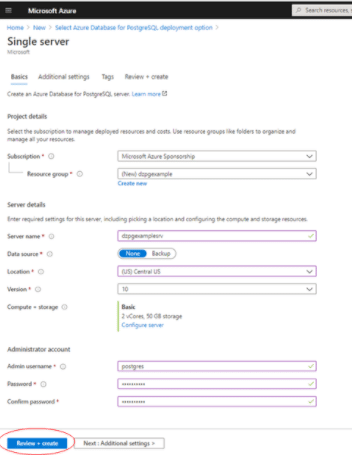
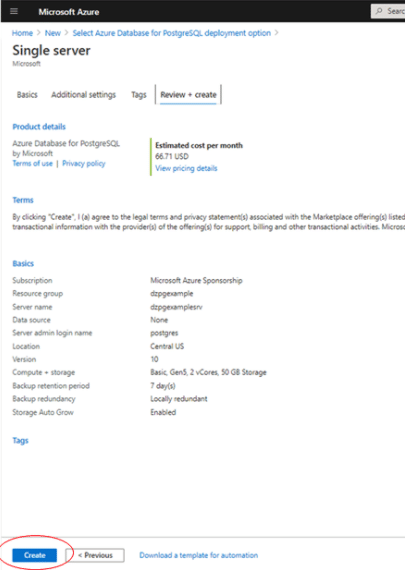
4. Fill in the single server worksheet wizard and hit the “Review and Create” button.
This screen is a great example of why to use the wizard the first time you are working with a cloud object. Knowing which fields are available and which are mandatory helps as you think about what it would take to automate it in the future. For our purposes we will use:
- Resource group – All Azure objects get organized into these handy buckets. I will create a new one for this exercise.
- Server name
- Data Source – ‘none’ means a new/empty server
- Location
- Version – this really means the Postgres version. I just picked 10.
- Compute+storage – There is a lower tier called ‘Basic’ that is cheaper and should be sufficient for experimentation
- Admin username
- Admin password (note – Azure enforces a ‘strong’ password)
At this point, you are good to go. You can look at the additional settings and the rest of the wizard, but for basic/getting started purposes this is enough and you can press the “Review + create” button.
5. Look at the Review form and click the “Create” button.
6. Once it’s done, click the “Go to Resource” button.
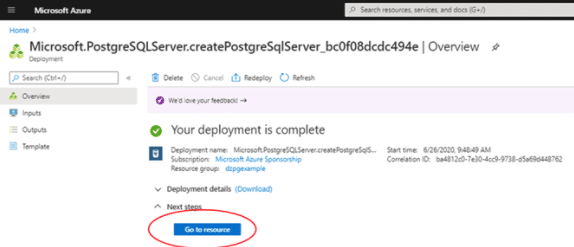
7. Congrats! You have an Azure Postgres database!

Post-provisioning configurations / Key information
Now that you have a shiny new DB server in the cloud, you need to do a few things to get it usable.
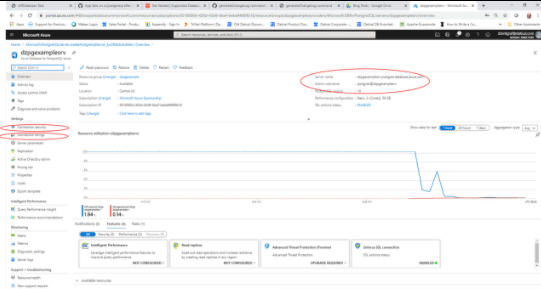
1. Key basic information / settings
- Top Right:
- DNS-accessible server name
- Reminder of admin username
- Left:
- Connection Security (firewall rules)
- Example connection strings for various languages
2. Open the firewall so your system can connect
- Get your outside IP using “whatsmyip” or similar.
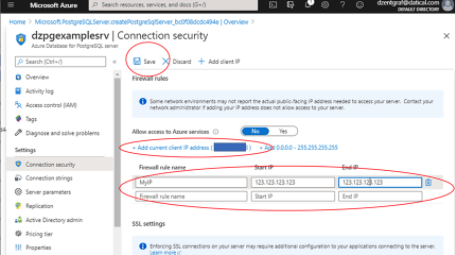
- Click the “Connection Security” item on the left side menu.
- On the “Connection security” page, you need to add a firewall rule for your current client IP.
Tip: There is a link to “Add current client IP address” that will automatically create the rule for you. This usually works great IF you are on the system you will be using to connect to the database from.
- If you are on a different system or the IP is not correct, you can populate the rule manually with the correct IP address.
- Whichever method you use, remember to SAVE at the top.
Set up the Example DB
1. Connect with psql and create example database.

2. Make sure you can connect to the new database.

3. Populate the database with a demo schema.
Note: I used this SQL file.

Connecting Liquibase
This example assumes you are familiar with the generic Liquibase example for Postgres tutorial.
1. Create your liquibase.properties file.

Key items you'll need:
- changeLogFile = path to your empty changelog XML file for the database. You can use the empty example from the generic Postgres example.
- Driver = shortname for the Postgres jdbc driver
- Url = This is the JDBC connection string information for your Azure Postgres database. You can get the key values (servername) from the Azure object screen. Note that the “Connection Strings” template in the Azure UI may be useful as a template, but a lot of the values (such as username & password) need to be removed from the url string to work with Liquibase – they are handled separately.
- username = the username you specified for the database
- password = the password you specified for the database
- classpath = the location of the Postgres JDBC driver .jar file. Downloadable from here: https://jdbc.postgresql.org/download.html
NOTE: If you are a Liquibase Pro user, you can add your license key information here, too.
2. Get the status.
liquibase status3. Generate a changelog and inspect it.
liquibase --changeLogFile=myexampledb.xml generateChangeLog4. Make the generated changelog your working changelog.
Copy myexampledb.xml over example.xml.5. Run a changelog sync.
liquibase changeLogSync6. Add a changeset to the example.xml changeLog file.
Add this block of XML to the last changeSet object inside the <databaseChangeLog></databaseChangeLog> block.
<changeSet  id="example_new"  author="dan">
        <createTable  tableName="example">
            <column  name="id"  type="int">
                <constraints  primaryKey="true"  nullable="false"/>
            </column>
            <column  name="name"  type="varchar(50)">
                <constraints  nullable="false"/>
            </column>
            <column  name="active"  type="boolean"
              defaultValueBoolean="true"/>
        </createTable>
   </changeSet>
7. Run an update.
This command tells Liquibase to add the new changeset we created in our changeLog to our Azure Postgres database.
liquibase update
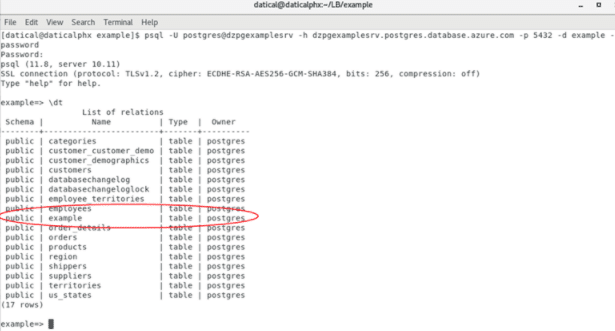
liquibase update8. Inspect the database for the new table.

.svg)


%20(1).png)


